 Pin it
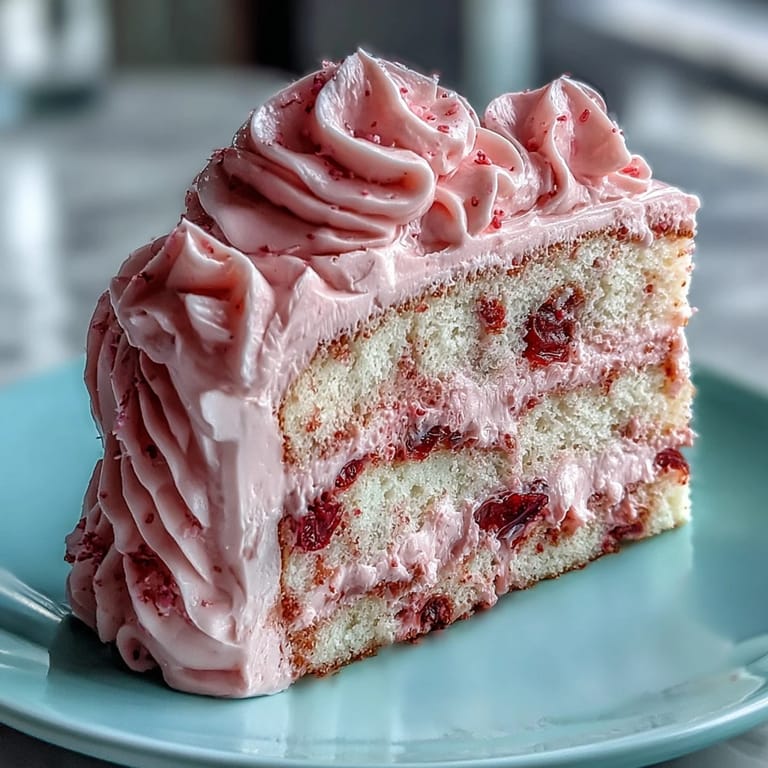
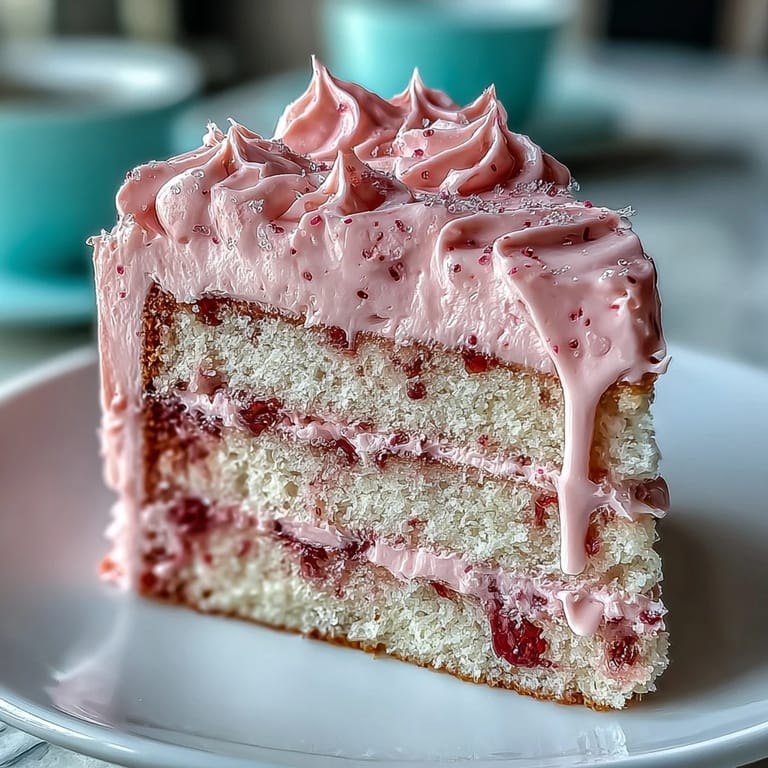
 My friend texted me a photo of a pink ombre cake she'd seen at a bakery, and I could practically feel her disappointment through the screen—the price tag was astronomical for what amounted to vanilla cake and buttercream. That's when I decided to make one for her Valentine's Day party, and honestly, the moment I piped those three shades of strawberry pink from bottom to top, watching them blend into this gorgeous gradient, I understood why she was so mesmerized. There's something almost magical about turning a simple vanilla cake into something that looks like it belongs in a fancy patisserie, except you made it in your own kitchen with butter-stained hands and a goofy smile.
I'll never forget my neighbor peeking over the fence while I was carrying this cake to a Valentine's gathering, her eyes going wide like she'd caught me red-handed with something illicit. She asked if I'd bought it, and when I said I made it, she actually asked for the recipe right there on the spot, which meant so much more than any compliment ever could. That cake became the reason three people in my circle started baking layer cakes, which is kind of beautiful when you think about it.
Ingredients
- All-purpose flour: The foundation of a tender crumb—make sure it's sifted or use the spoon-and-level method so you don't accidentally add too much and end up with a dense cake.
- Baking powder: This is what gives the cake its lift and airy structure, so don't skip it or try to substitute it with baking soda.
- Unsalted butter: Room temperature is non-negotiable here—cold butter won't incorporate properly and you'll lose that fluffy texture.
- Granulated sugar: Use regular white sugar, not brown, because brown sugar would change the color and flavor profile of both the cake and frosting.
- Eggs: Also room temperature, which helps them emulsify into the batter smoothly and creates a better crumb structure.
- Pure vanilla extract: The real stuff matters more in a simple cake like this where vanilla is one of the main flavors.
- Whole milk: Room temperature milk prevents shock to the batter and distributes evenly without temperature fluctuations.
- Powdered sugar: Must be sifted to avoid lumps that'll show up in your smooth buttercream.
- Freeze-dried strawberries: Ground into a fine powder, these give authentic strawberry flavor and beautiful pink color without adding moisture that fresh berries would.
- Heavy cream: A touch of this loosens the buttercream to a spreadable consistency without making it greasy.
- Pink gel food coloring: Gel coloring is stronger than liquid, so you use less and don't accidentally thin out your frosting.
Tired of Takeout? 🥡
Get 10 meals you can make faster than delivery arrives. Seriously.
One email. No spam. Unsubscribe anytime.
Instructions
- Get your mise en place sorted:
- Preheat your oven to 350°F and prep three 8-inch round pans with parchment circles cut to fit the bottom—this prevents sticking and makes layer removal a breeze. Gather all your ingredients and let them sit out so everything reaches room temperature, which is honestly the secret move that separates decent cakes from exceptional ones.
- Whisk the dry ingredients:
- In a medium bowl, whisk together your flour, baking powder, and salt, breaking up any little clumps as you go. This distributes the leavening agent evenly so you don't get dense pockets in random places.
- Cream the butter and sugar until clouds form:
- In your large bowl or stand mixer, beat the room-temperature butter and sugar on medium-high for about 3 minutes until it's pale, fluffy, and almost looks like frosting. This step incorporates air into the batter, which translates to a lighter, more tender cake.
- Add eggs one at a time with intention:
- Beat in each egg individually, making sure it's fully incorporated before you add the next one—this prevents the mixture from breaking and ensures even texture. Scrape down the sides of your bowl with a spatula because there's always egg hiding in there.
- Fold in vanilla and the alternating layers:
- Stir in your vanilla extract, then add the flour mixture and milk to the butter mixture in alternating batches, starting and ending with flour—this prevents overmixing, which would develop gluten and make your cake tough.
- Divide and bake until golden:
- Pour the batter evenly into your three prepared pans and smooth the tops with a spatula so they bake evenly. Bake for 25 to 30 minutes until a toothpick inserted in the center comes out clean and the tops are barely golden—don't overbake or you'll get dry cake.
- Cool with patience and care:
- Let the cakes cool in their pans for 10 minutes so they set slightly and won't fall apart, then turn them out onto wire racks and cool completely. This cooling step is crucial because warm cake is fragile, and you want sturdy layers for stacking.
- Make the strawberry buttercream magic:
- Beat your room-temperature butter in a large bowl until it's creamy and pale, then gradually add your sifted powdered sugar so it doesn't go flying everywhere. Mix in the ground freeze-dried strawberries, heavy cream, vanilla, and a pinch of salt, then beat until it's fluffy and smooth—taste it and adjust sweetness if needed.
- Create your ombre palette:
- Divide the buttercream into three equal bowls—leave one as pale pink or white, tint the second with a few drops of gel coloring to light pink, and the third with more coloring to a deeper pink. It helps to add coloring a tiny bit at a time so you don't overshoot and end up with hot pink when you wanted blush.
- Set up your piping bags and assemble:
- Put each shade of buttercream into its own piping bag, or set them aside in bowls if you're spreading by hand. Level your cake layers with a serrated knife if they domed during baking, then place the first layer on your serving plate.
- Stack and frost with purpose:
- Spread the lightest buttercream on top of the first layer, add the second layer, repeat with medium pink, then top with the third layer and the darkest pink. Don't use too much frosting between layers or it'll squeeze out and make a mess when you press down.
- Create the ombre effect with finesse:
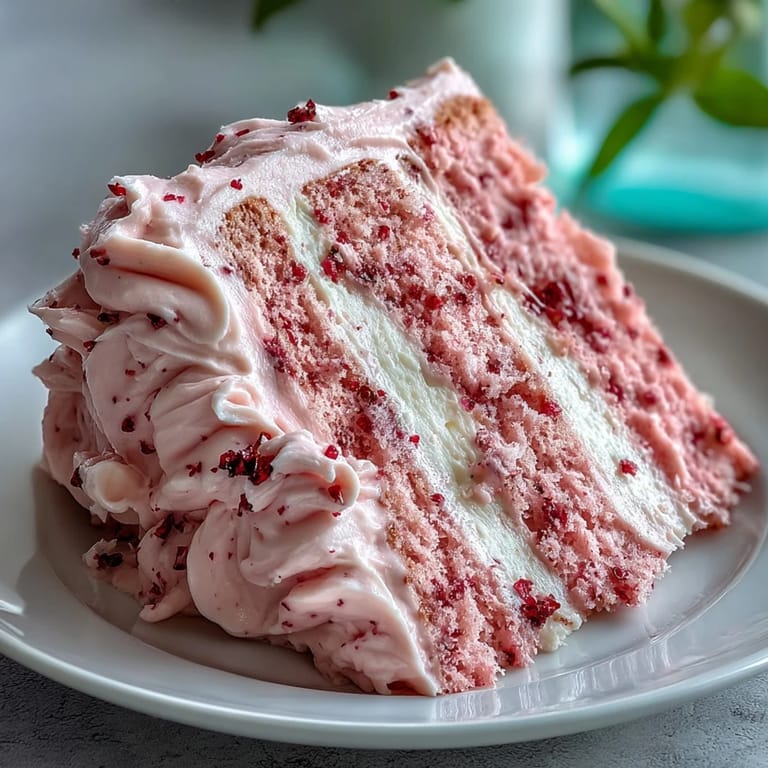
- Using an offset spatula or cake scraper, apply the darkest pink buttercream around the bottom third of your cake, medium pink in the middle section, and lightest pink on top. Use gentle, vertical strokes to blend the colors slightly where they meet, creating that gorgeous gradient effect—it doesn't need to be perfect, imperfect blending actually looks more organic.
- Garnish and chill to set:
- Top with fresh strawberries if you like and a sprinkle of edible glitter or sprinkles for extra sparkle, then refrigerate for at least 30 minutes so the frosting firms up. This chilling time makes slicing cleaner because the cold buttercream holds its shape better.
 Pin it
 My sister actually got teary when she cut into her slice and saw those perfect pink layers with the ombre frosting on the outside—it wasn't just about how it looked, it was knowing someone made it with their hands just for her. That's when I realized this cake is really about showing up for people in a way that says, 'You're worth the three hours and the butter-stained apron.'
Make-Ahead and Storage Wisdom
I've learned the hard way that planning ahead is your best friend with this cake. You can bake the layers up to a month in advance if you wrap them well and freeze them—just thaw them at room temperature before frosting, which actually makes assembly easier because cold cake doesn't crumble. The buttercream keeps in the fridge for a week if stored in an airtight container, so you can make it the day before and just let it come to spreadable consistency on the counter for 20 minutes before using.
Troubleshooting the Common Bumps
When I first made this, my ombre looked more like sad pink stripes because I was too timid with the blending—turns out you need to actually swipe that offset spatula across the color boundaries with a little confidence. If your buttercream feels too thick to spread, warm the spatula under hot water and wipe it dry between strokes, which softens the frosting just enough to glide smoothly. And if the cake layers somehow dome too much, a serrated bread knife held parallel to the cutting board takes off the hump without sawing—just mark your cutting line with a toothpick first so you stay level.
Pairing and Presentation Ideas
This cake has an elegance that deserves a little ceremony, so I always pair it with something bubbly—sparkling rosé or champagne if you're feeling fancy, or even a simple sparkling lemonade for non-drinkers. The light strawberry notes work beautifully with fruity, slightly sweet cocktails, and honestly, just fresh coffee or tea makes this feel special enough on its own.
- Fresh strawberries sliced and fanned on top add height and make the presentation feel restaurant-worthy.
- Edible glitter catches light and makes people instinctively reach for their phones—in the best way.
- A simple dessert plate with a small dollop of extra buttercream next to the slice adds sophistication without fussing.
 Pin it
 This cake is proof that restaurant-quality desserts aren't about fancy techniques—they're about patience, room-temperature ingredients, and caring enough to do it right. Make it for someone you love, and I promise the effort translates into something they'll remember.
Recipe FAQs
- → How do I achieve the pink ombre buttercream effect?
Divide the strawberry buttercream into three portions, tint each with varying amounts of pink gel food coloring, and apply them from darkest to lightest from bottom to top, smoothing gently to blend.
- → Can I prepare the cake layers in advance?
Yes, cake layers can be baked ahead and frozen for up to one month, making preparation easier for special occasions.
- → What is the best way to frost the layers evenly?
Use an offset spatula to spread an even layer of buttercream between each cake layer and smooth the outside for a clean finish.
- → How can I intensify the strawberry flavor?
Consider adding a thin layer of strawberry jam between the cake layers to enhance the fruitiness.
- → What tools are essential for assembling this cake?
You'll need cake pans, mixing bowls, a stand or hand mixer, parchment paper, an offset spatula, a cake scraper, and piping bags for the buttercream.