 Pin it
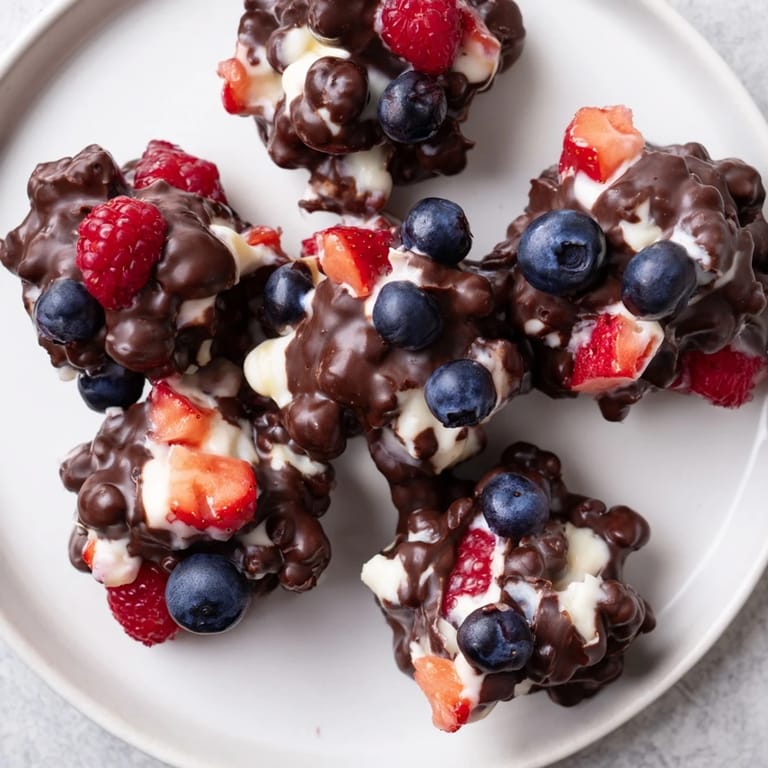
 One afternoon, I was standing in my kitchen with a container of Greek yogurt and absolutely nothing to do with it. My roommate had left a bowl of fresh berries on the counter, and I was munching on a square of dark chocolate when it hit me: what if I could make these three things into something you could actually grab with your hands and eat frozen? That first batch was messy and imperfect, but the moment I bit into one and heard that chocolate crack while the creamy yogurt center melted on my tongue, I knew I'd stumbled onto something special.
I made these for a friend's small gathering one summer, and I watched someone eat three of them without saying anything, then look at me with genuine surprise and ask what they were. That quiet moment of discovery is why I keep making them. They've become my thing to bring when I want to show up with something that feels both simple and thoughtful.
Ingredients
- Greek yogurt: The thick, creamy base that stays tangible when frozen, whether you pick plain for brightness or vanilla for sweetness.
- Honey or maple syrup: A touch of this pulls the yogurt from purely tart into balanced territory where the berries can shine.
- Mixed fresh berries: Blueberries, raspberries, and strawberries add bursts of flavor and natural moisture; chop larger berries so they distribute evenly.
- Dark chocolate chips or chopped chocolate: Use something you'd actually eat on its own, because that quality matters when it's the outer shell.
- Coconut oil: A small amount makes the chocolate thin enough to coat smoothly without being heavy, but it's honestly optional if you're patient with tempering.
Tired of Takeout? 🥡
Get 10 meals you can make faster than delivery arrives. Seriously.
One email. No spam. Unsubscribe anytime.
Instructions
- Set up your workspace:
- Line a baking sheet with parchment paper and clear a spot in your freezer. Small prep work now prevents fumbling later when you're holding cold, sticky clusters.
- Make the yogurt mixture:
- Stir the Greek yogurt and honey together until completely smooth, then gently fold in the berries like you're trying not to crush them. A few broken bits are fine; just avoid mashing them into submission.
- Form the clusters:
- Use a heaping tablespoon to drop twelve mounds onto the parchment, spacing them so they don't touch. Don't worry about perfect shapes; rustic looks better anyway.
- First freeze:
- Slide the sheet into the freezer and let everything go solid for 1 to 2 hours. You'll know they're ready when they feel dense and don't budge when you poke them.
- Melt the chocolate:
- If using a microwave, melt in 20 second bursts, stirring between each, until completely smooth and glossy. A double boiler works too and gives you more control, though it's a bit more fussy.
- Dip and coat:
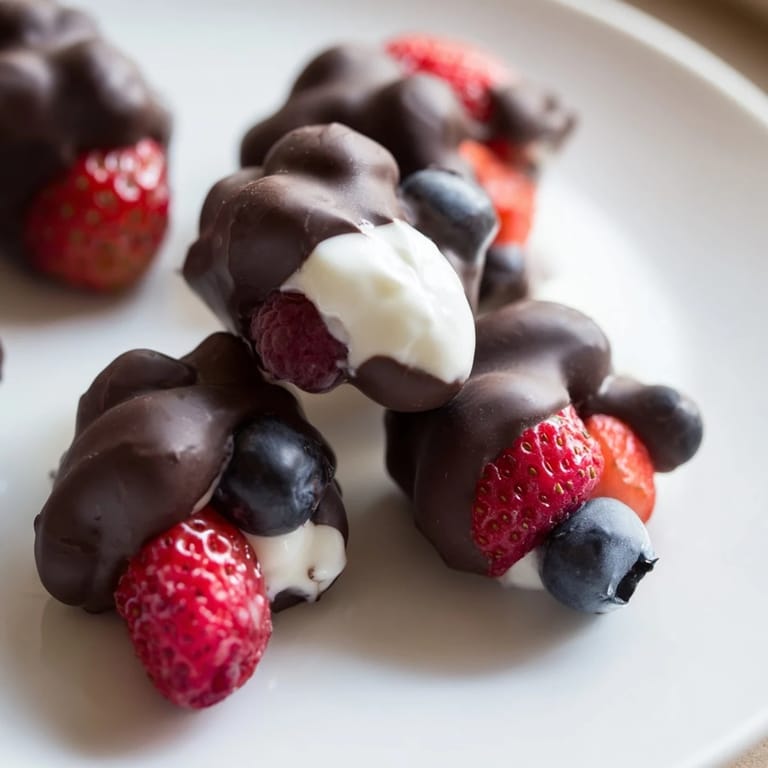
- Using a fork, submerge each frozen cluster into the warm chocolate, let it rotate for a second so the coating covers all sides, then hold it above the bowl to let excess chocolate drip off. The fork keeps your fingers from warming the yogurt.
- Final freeze:
- Return the chocolate covered clusters to the parchment and freeze for at least 15 minutes until the chocolate shell is completely set and snappy.
 Pin it
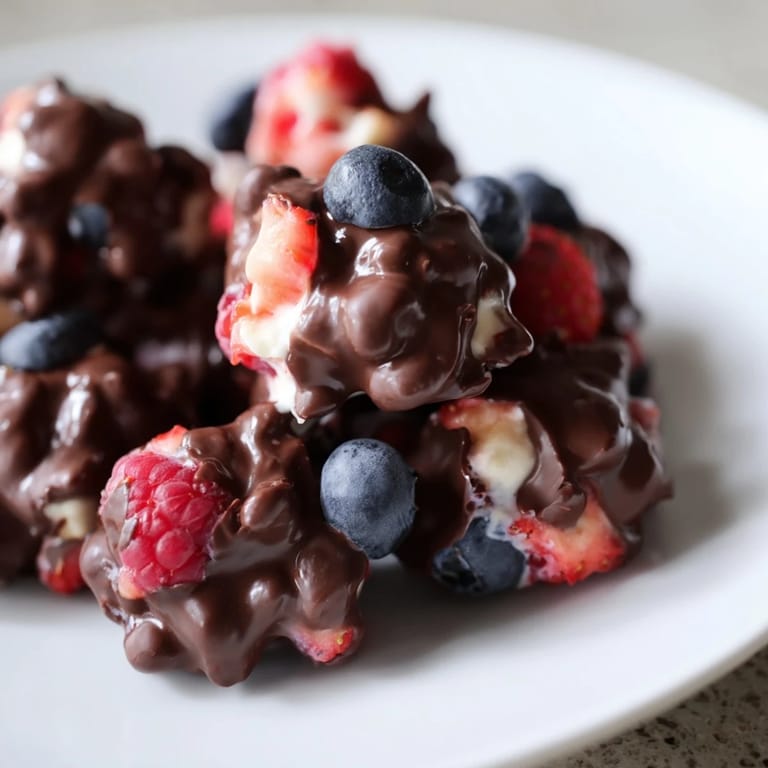
 There's something almost luxurious about reaching into your freezer and finding a stash of these. They feel like a treat you made for yourself, which is rare and worth savoring.
Playing with Flavors
Once you nail the basic version, the fun begins. Swap berries for chopped nuts, dried fruit, or mini chocolate chips. Use white or milk chocolate for something lighter, or double down on dark chocolate and add a pinch of sea salt. I've made versions with a hint of vanilla extract in the yogurt and one unforgettable batch with crushed pistachios mixed into the coating, and they all felt like discoveries rather than mistakes.
Storing and Serving
These live happily in an airtight container in the freezer for weeks, though they rarely last that long once someone knows about them. Eat them straight from the freezer; they're meant to be cold and slightly resistant to your bite. They pair beautifully with iced coffee or cold brew on warm afternoons when you want something that feels indulgent but actually nourishes you.
Making Them Your Own
The beauty of these clusters is how forgiving they are. Your kitchen doesn't need special equipment, and the hardest part is really just being patient with the freezing time. If you're vegan, swap in plant based yogurt and dairy free chocolate and the magic stays intact.
- Always verify chocolate packaging if you have nut allergies, as there's sometimes cross contamination.
- Make a double batch because they disappear faster than you'd expect.
- Serve them when people are tired or need a small surprise, and watch their faces light up.
 Pin it
 These clusters remind me that the best snacks are the ones you actually reach for, and the ones made at home always taste a little better. They're proof that sometimes the simplest ideas, done with attention, become something people remember.
Recipe FAQs
- → Can I use other fruits instead of berries?
Yes, chopped nuts, dried fruits, or even mini chocolate chips can replace berries to vary the flavor and texture.
- → How do I get a smooth chocolate coating?
Melting dark chocolate with a little coconut oil helps achieve a glossy, smooth coating that hardens nicely on the clusters.
- → What is the best way to freeze these clusters?
Freeze yogurt dollops first until solid, then dip in chocolate and freeze again to ensure a firm chocolate shell.
- → Can these clusters be made vegan?
Yes, substitute plant-based yogurt and dairy-free chocolate for a vegan-friendly version.
- → How should leftovers be stored?
Keep them in an airtight container in the freezer to maintain freshness and crunch.